For this tutorial, we need you to have Eclipse installed: Install Eclipse. For what we do, we recommend installing the Eclipse Modeling Tools (not Classic, not Java Developers).Install the KIELER KGraph Editing and Visualization feature
Go to Help > Install New SoftwareUse either of our nightly update site at http://rtsys.informatik.uni-kiel.de/~kieler/updatesite/nightly/ or one of the releases.Check the following items and press next.KIELER Layout - KIELER KGraph Editing and VisualizationKIELER Sources - KIELER KGraph Editing and Visualization (Source)KIELER Sources - KIELER Layout API (Source)
 Image Removed Image RemovedYou will first need an Eclipse installation to hack away on layout algorithms with. Since we have a shiny Oomph setup available, this turns out to be comparatively painless: Go to this site and download the Eclipse Installer for your platform. You will find the links at the bottom of the Try the Eclipse Installer box. Start the installer. Click the Hamburger button at the top right corner and select Advanced Mode. Why? Because we're computer scientists, that's why! Select Eclipse Modelling Tools from the Eclipse.org section and click Next.
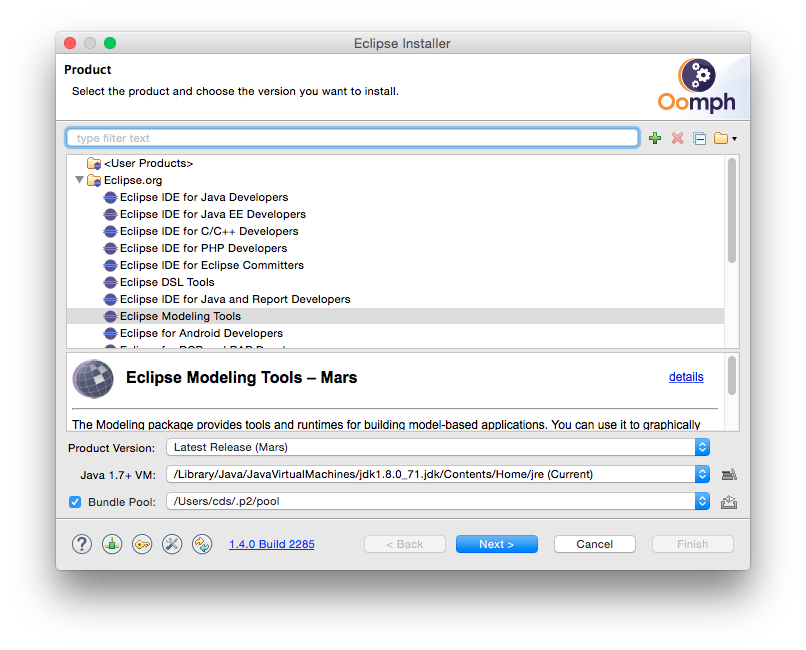 Image Added Image Added - Next, we need to tell Oomph to get everything ready for layout algorithm development. Download our Oomph setup file, click the Plus button at the top right corner and add the setup file to the Github Projects catalog. Select the new Graph Drawing entry by clicking the check box to its left. This will cause an item to appear in the table at the bottom of the window. Once you're done, click Next.
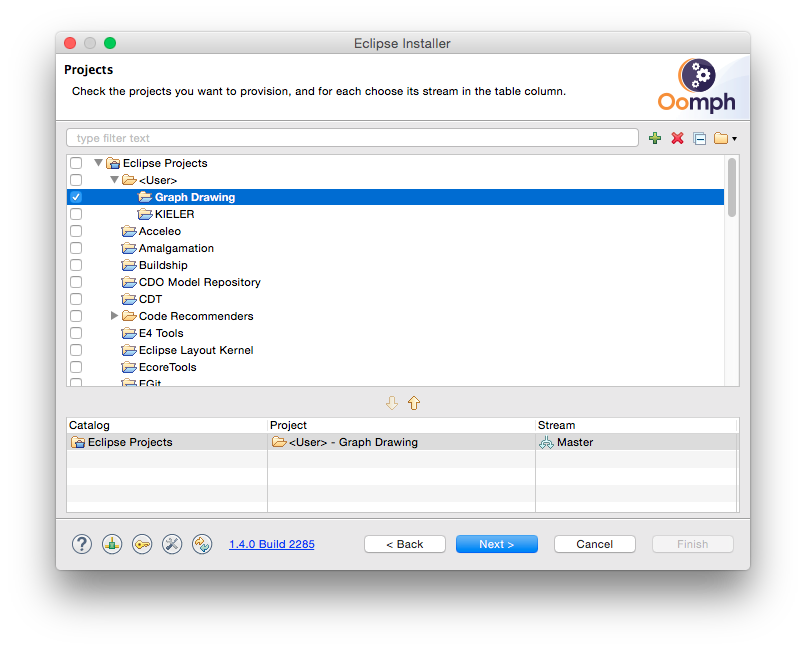 Image Added Image Added Oomph now asks you to enter some more information. You can usually leave the settings as is, except for the Installation folder name. This will be the directory under which all your Eclipse installations installed with Oomph will appear, each in a separate sub-directory. Select a proper directory of your choice and click Next.
|