Introduction
This guide will help get you set up to be able to work on your homework assignments. Yay! Get a cup of coffee and work your way through it.
First, you will have to decide between the following two options:
- Working on the computer accounts we provide.
- Working on your own laptop.
This guide will guide you through both of these options. We will first look at how to get each option set up properly. After that, we will look at the Eclipse development environment.
Contents
Getting Everything Ready and Installed
Working With the Accounts We Provide
Working with the accounts we provide has the advantage that most things are already set up for you. To do so, either go to the Grundausbildungspool (GAP; the thing we have our practicals in) in the basement of Hermann-Rodewald-Straße 3 or login to the servers using your own computer. In both cases, you need to login with the credentials you got when you signed up for studying computer science (the user name will most likely be something like stu0000). To connect using your own computer, you need to download the ThinLinc Software Client, see "Terminalserver" on this site. Once you are logged in, you can find a development environment called Eclipse through the start menu.
Whatever way you choose: to get ready to work on your homework assignments, you do have to download the ACM Java library. Click this link and save the file somewhere you'll be able to find it again.
Working on Your Own Computer
To be able to work on your own computer, you need to make sure that you have three things installed:
- The Java Development Kit. If you're running Linux, you can probably simply install a Java package (usually called OpenJDK) from your package manager. If you're running Windows or Mac OS, go to this site, accept the license and download the distribution for your operating system.
- The Eclipse development environment. Simply follow this tutorial to install the Eclipse IDE for Java Developers.
- The ACM Java library most of our assignments use. Click this link and save the file somewhere you'll be able to find it again.
Working With Eclipse
This section will help you get to grips with the Eclipse development environment. We'll start with a small tour around Eclipse, and finish by walking through all the steps necessary to actually write and execute your first Java program.
A Tour Through Eclipse
When you start Eclipse for the first time, you'll see something like the following dialogue that asks you for where you want your workspace to be saved:

The workspace is where you will be saving all your homework. If you haven't worked with Eclipse before, just click OK and thereby accept the default location. Eclipse then loads and greets you with a nice welcome screen. Feel free to switch off the "Always show Welcome at start up" option at the bottom and dismiss the screen by clicking the X at the top.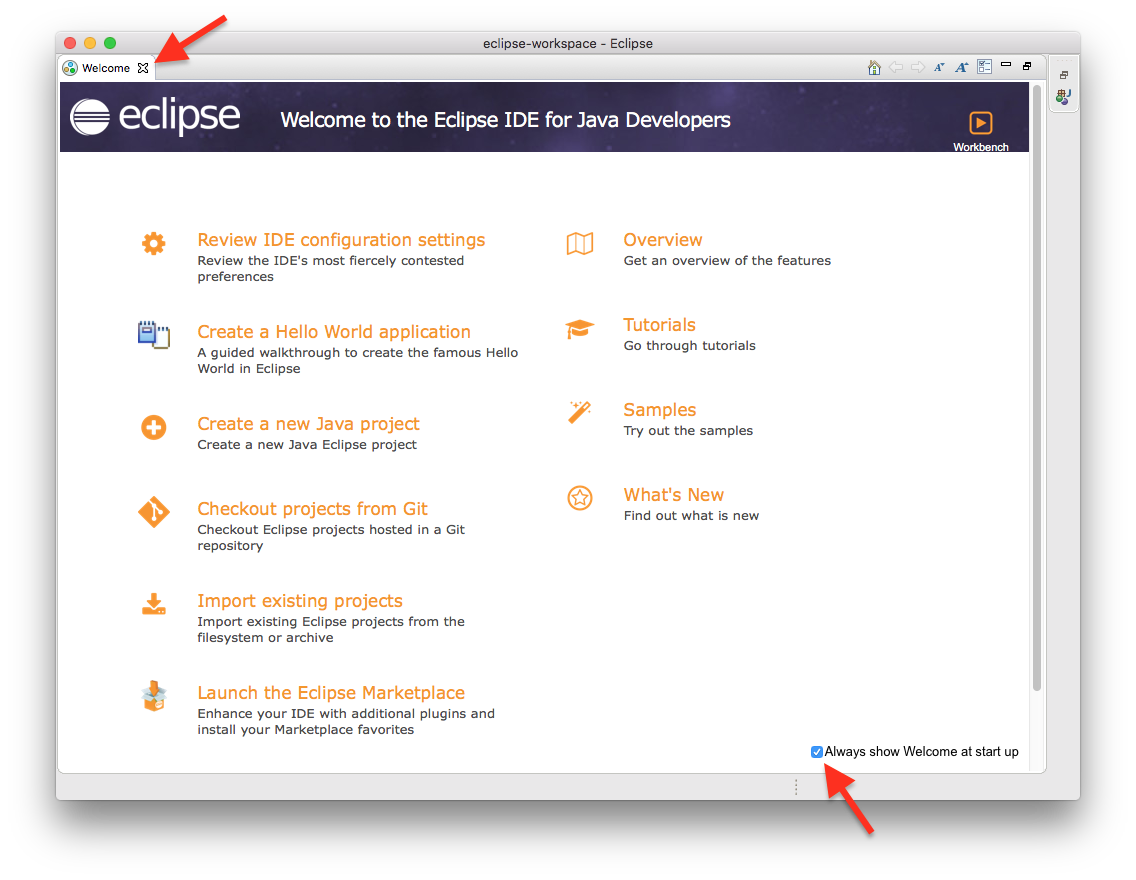
What you see next is the actual Eclipse development environment that you'll be spending most of your time in:
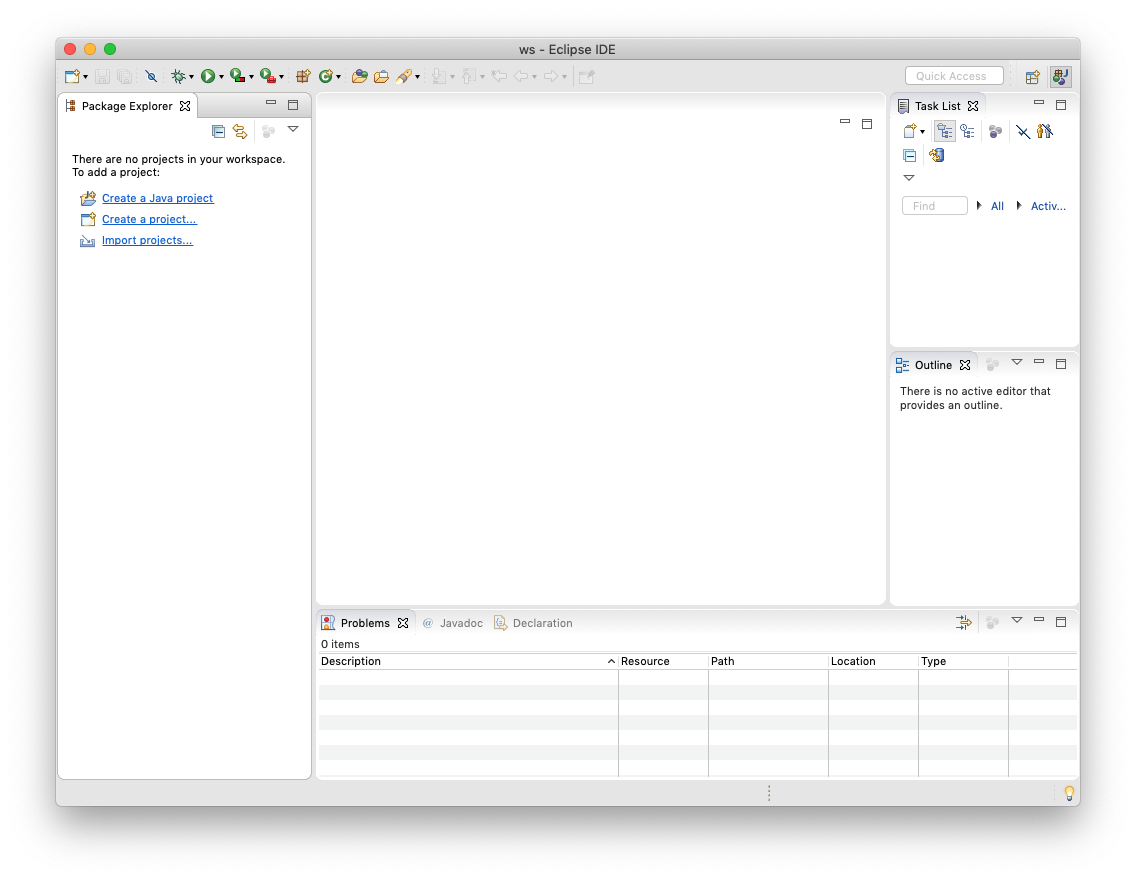
The window is divided into different areas. Most of them contain views, such as the Package Explorer to the left. The big empty area at the centre of the screen will house the Java source code editor, a text editor to write Java code with. You can drag views around, and close them as you wish. For example, you won't need the Task List during our lecture, so close it now. If you want to reopen a view you have closed, you can find a list of all available views through the menu by clicking Window → Show View → Other.
Writing and Executing Java Programs
To solve your homework assignments, you will need to know how to create new Java projects, add classes to them, and how to execute them. Let's start by creating a new project. Click the File → New → Java Project. This will open the following dialogue:

Enter a project name that describes the project. For your homework assignments, for example, you may want to create a separate project for each set of assignments, so a project name like "Set01" might work well for the first set. Leave the rest untouched and click Finish. You will probably see the following dialogue:
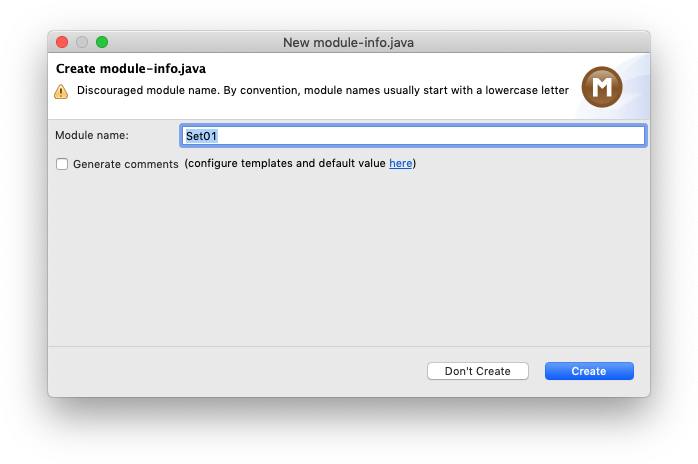
If that is the case, click the Don't Create button (things won't work otherwise).
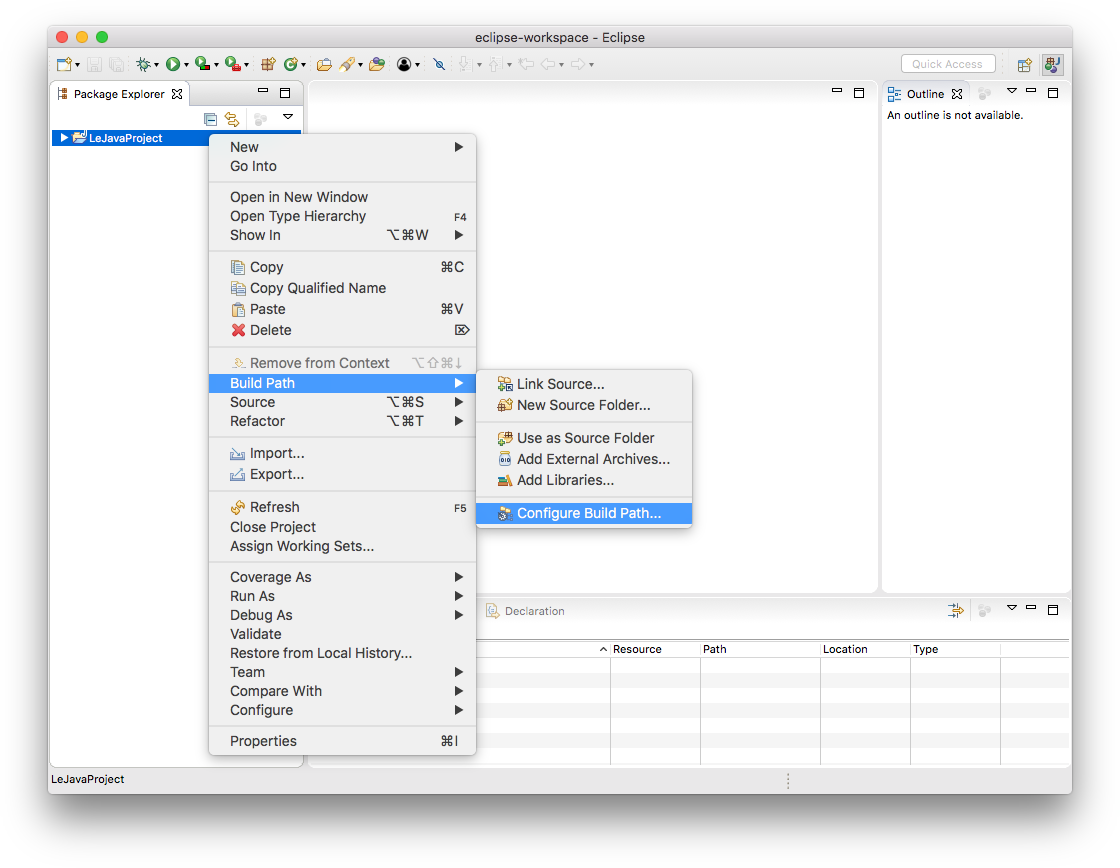
Your Eclipse workspace will now contain an entry for the new project. Eclipse has to be told that you want to use the ACM library with that project. To configure it that way, right-click on the project, click on Build Path and select Configure Build Path...:
Remember the ACM library you downloaded? This is where we need it. Since you will be making use of that library, we need to configure the project such that it knows that the library exists. To that end, switch to the Libraries tab and select the Classpath entry (If there is no such entry, don't worry about it…):
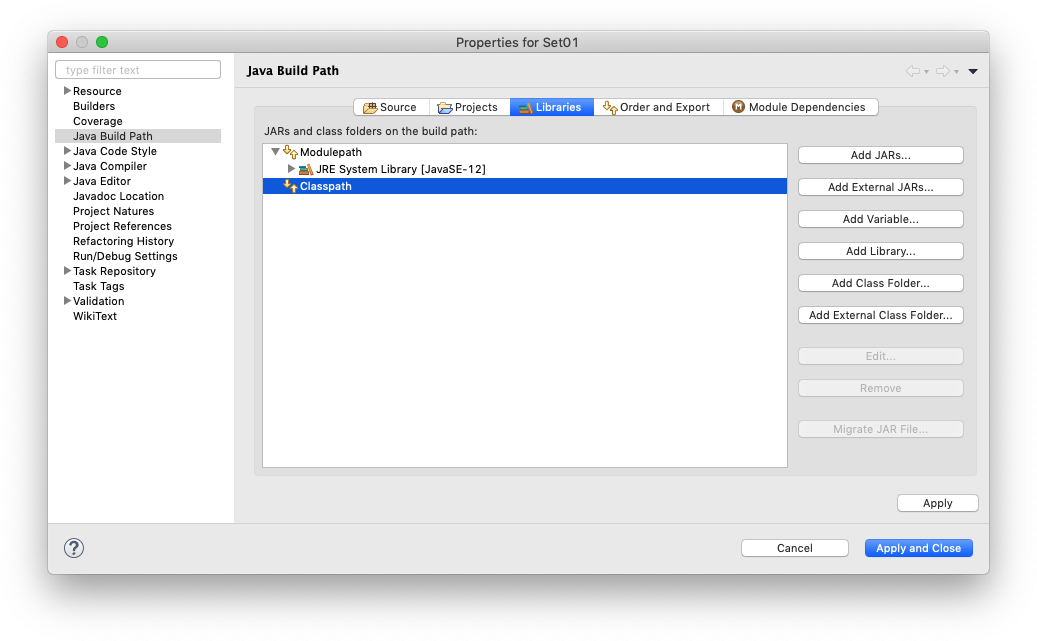
A library in Java is distributed as a file with a .jar file extension. Click on the Add External JARs button and select the downloaded ACM library (if you don't remember where you saved it, simply download the library again). Once you have found the library, it should show up in the dialogue. Click Apply and Close to dismiss the build path configuration and you're all set!
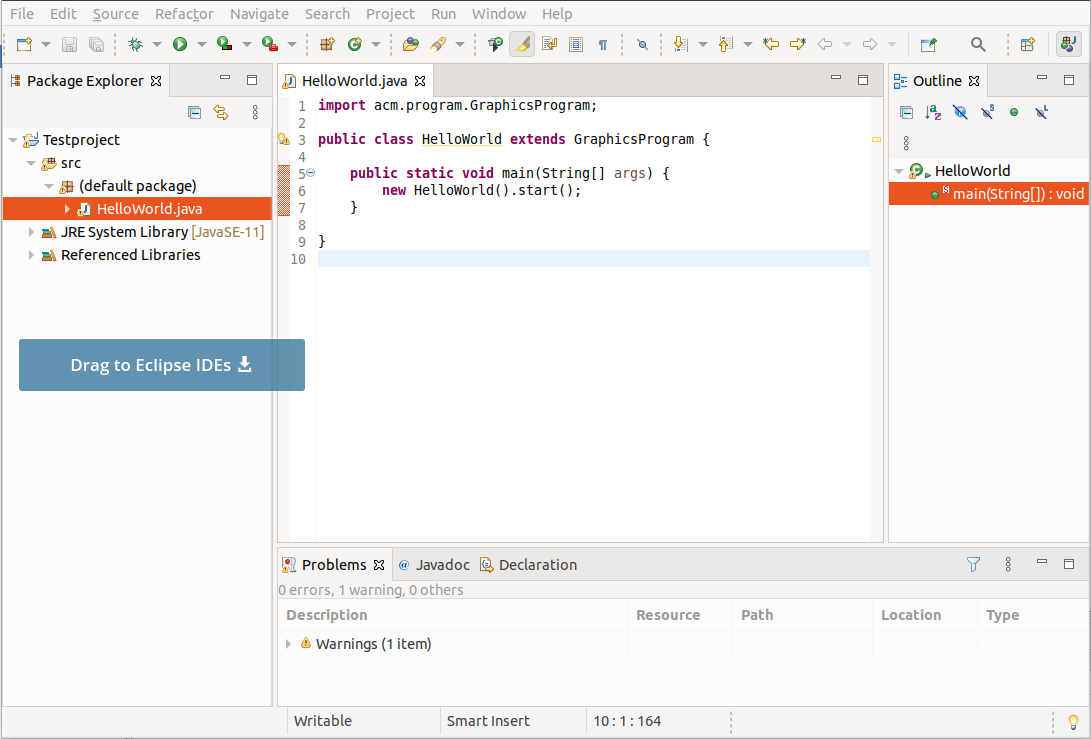
You are now ready to add your first class to your newly configured project. Right-click your new project in the Package Explorer and select New → Class:
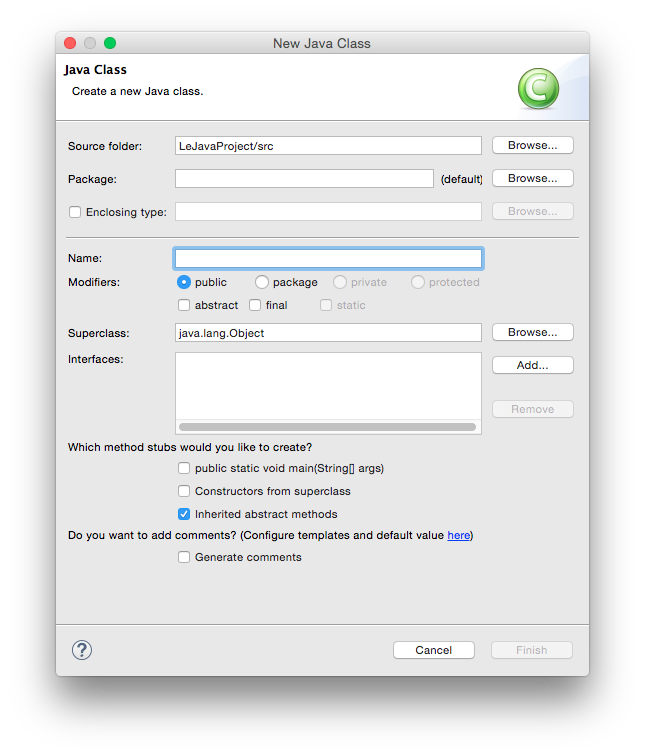
Give your class a proper name. The dialogue will tell you if your class name is valid or not. For the first few programming exercises, you want your class to extend a superclass, such as GraphicsProgram (to choose a superclass, click the corresponding Browse button). Also, be sure to click the strange box labelled public static void main(String[] args). The result may look something like this:
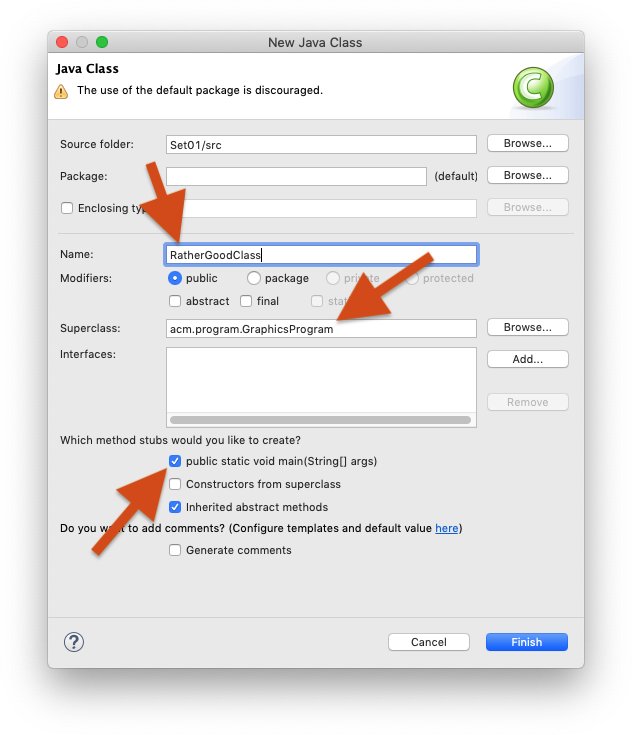
Note that the dialogue still gives us a warning because we have left the package name empty. You can safely ignore that warning for the moment. There will come a time when you will actually use packages, but now is not that time. Instead, click Finish. Eclipse will create the class for you and open it in an editor for you to start writing code:
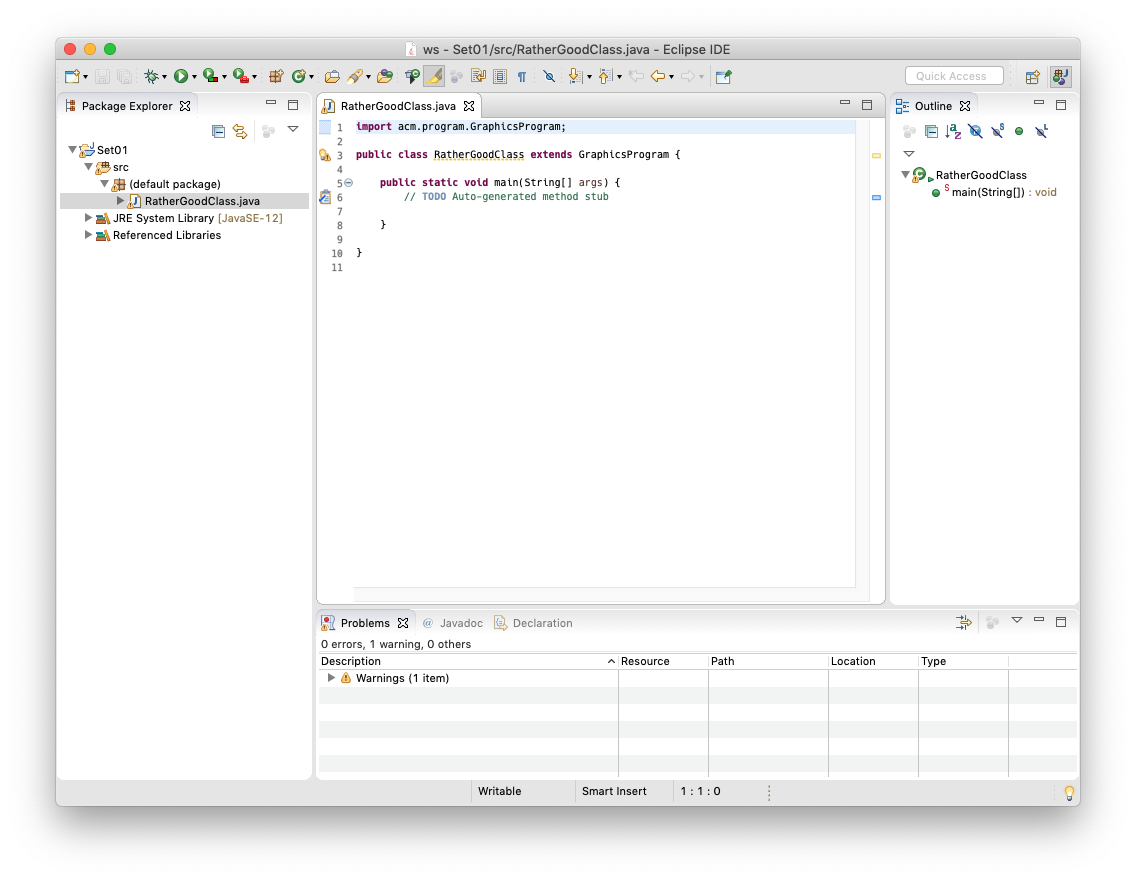
Let's say you have actually written a bit of code and want to see if it works. To do so, you will need to replace // TODO Auto-generated method stub with the following code:
new RatherGoodClass().start();
Of course, the class name (here RatherGoodClass) has to be replaced with the name you chose for your class.
Now you're ready to run your program. Right-click your class in the Package Explorer and select Run As → Java Application. If everything is fine, a window should pop up and your program should be executing. If instead Java cannot execute your program because of errors in your source code, Eclipse will tell you so:

In that case, hit Cancel and go hunt that error down. Remember the Problems view at the bottom of the Eclipse window? That's actually quite helpful for hunting down errors: it lists every error Eclipse was able to find. Double-clicking the error will jump to the offending part of the source code so you can fix it.
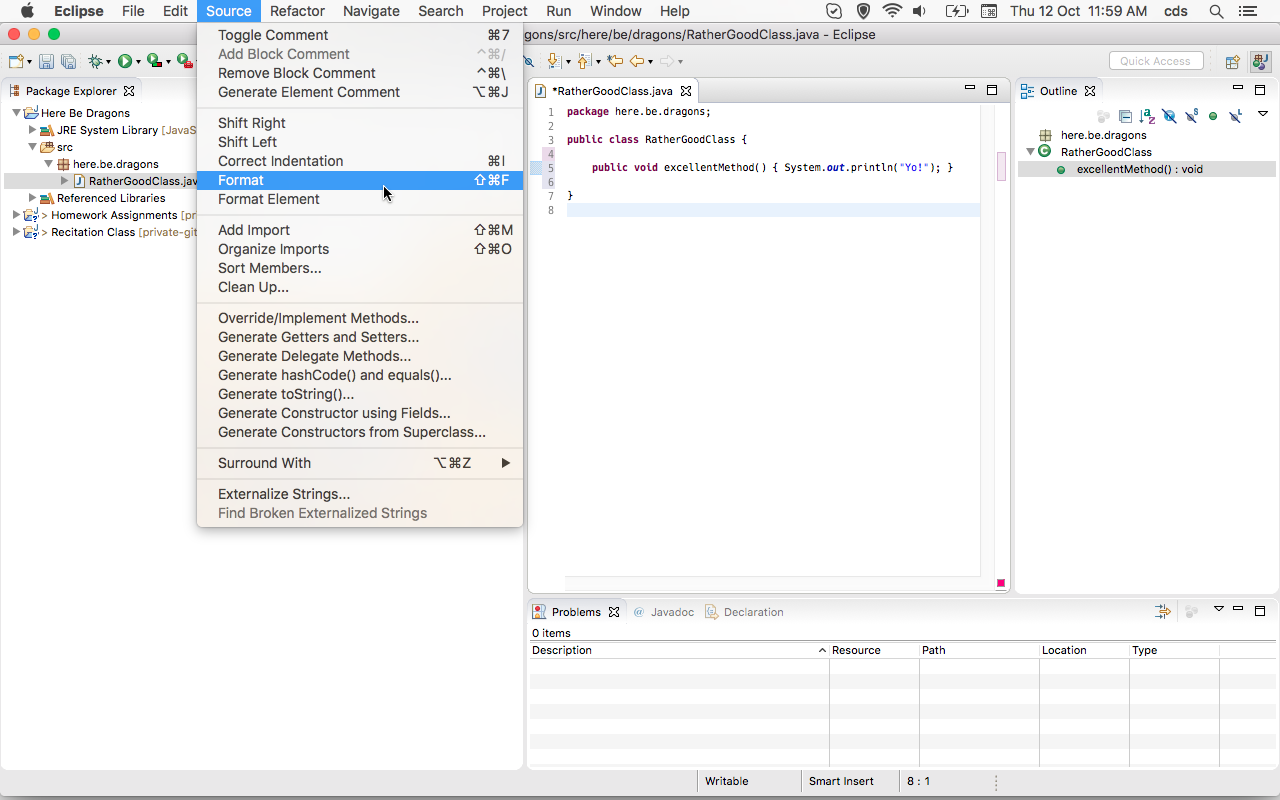
Formatting Source Code
The automatic tests we run on the source code you submit won't let you hand in badly formatted code. This is because we want to force you to write code that is properly readable. Fortunately, formatting your code properly is a matter of two clicks of a mouse button:
Importing Classes
There will be assignments where we ask you to import existing classes into your workspace. There are (at least) two ways to do so:
- Right-click the destination folder in your Eclipse project and choose Import....
- Use drag & drop.
We will now describe the latter. Start by downloading the respective class. Then, import it into your Java project by dragging and dropping it from your file explorer to your source folder, like this:
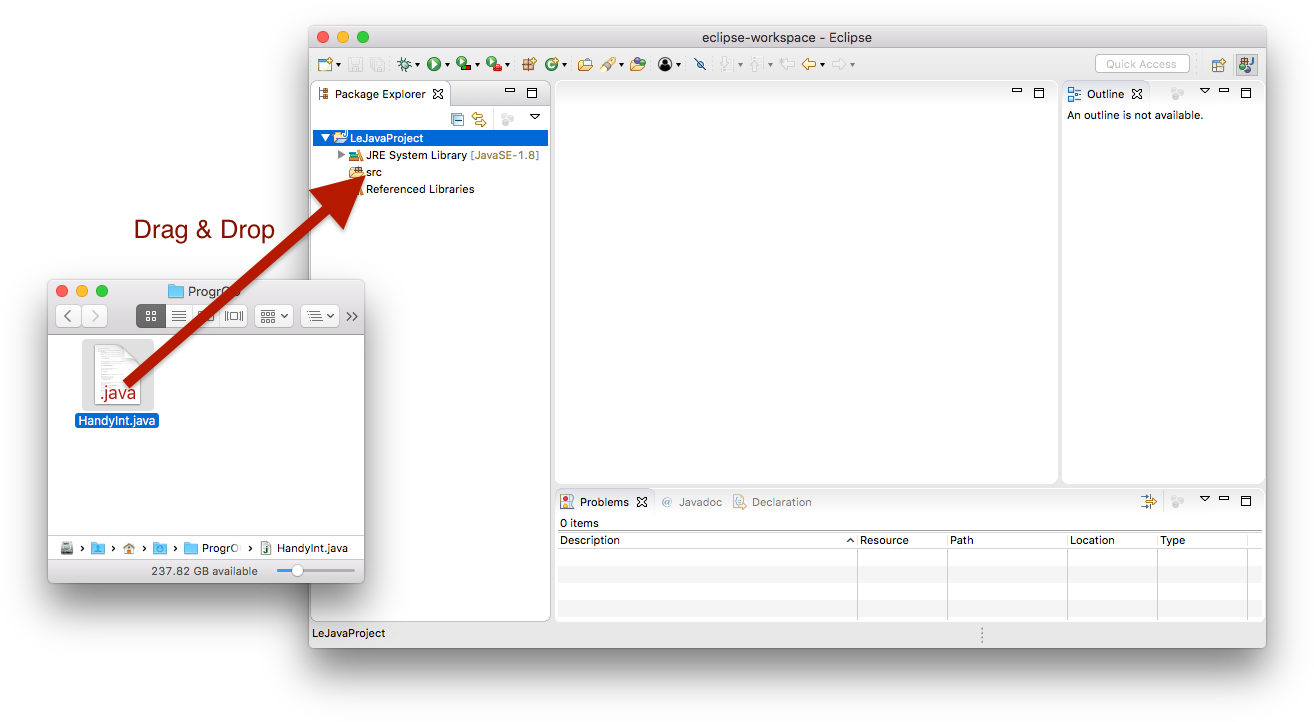
Eclipse will ask you whether you want to copy the file into your project or just link to it. You want the former:

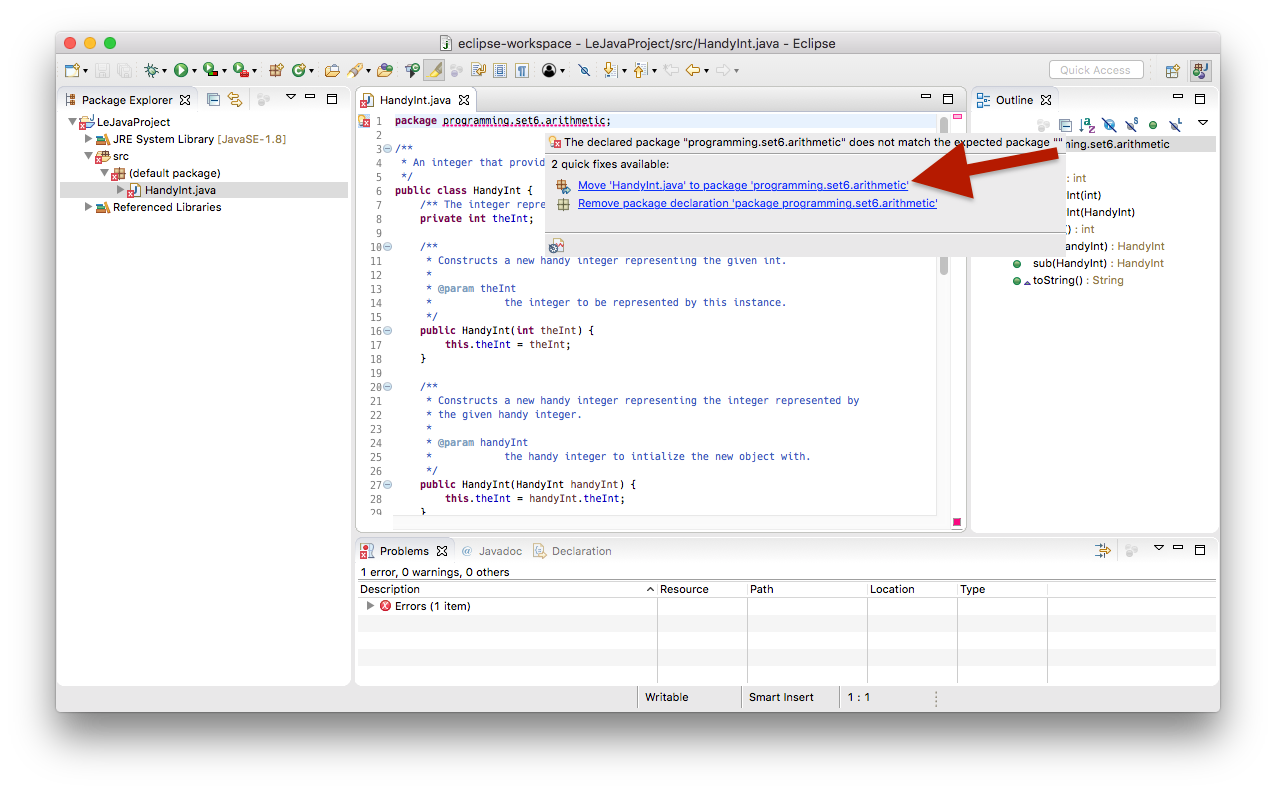
The imported file may declare to be in a different package than the one you imported it to, resulting in a compiler error. To fix that, simply open up the file, point the mouse cursor at the wrong package declaration, and choose to move the file to that package.
Allow Us to View Your Code
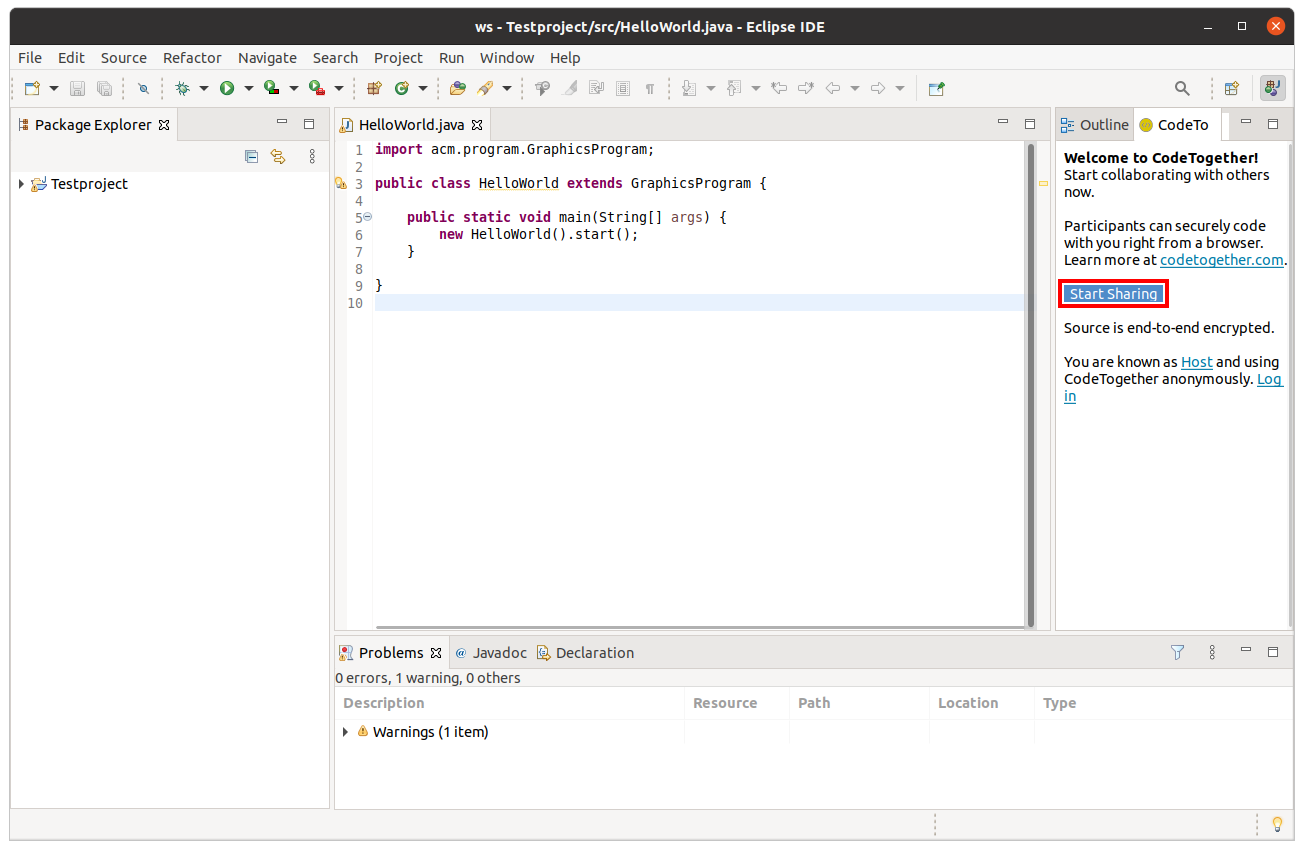
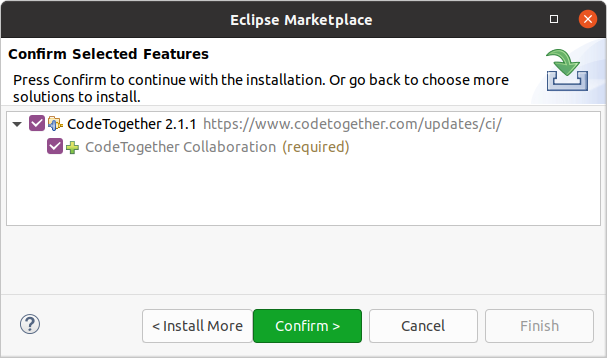
During the exercises, the instructors and assistants want to help you code and assist you if you run into problems that you cannot solve yourself. For this reason, we may want to have a look at your code to support you. As this is a little more difficult in an online teaching scenario and talking about your code while screensharing might limit us, we use CodeTogether as a code collaboration tool to help you. To install this in your Eclipse, visit this website and drag and drop the Drag to Eclipse IDE button directly into Eclipse. Make sure to drop it directly into the Package Explorer, as this dropping the link into the editor view does not start the installation process.
This opens a dialog to install CodeTogether using the Eclipse Marketplace. Click Confirm > and accept the licence agreement and Finish the dialog. Eclipse will promt you to restart to apply the software update, confirm that by clicking Restart Now.
Now a new view of CodeTogether will open. To share your code with us, click on the blue Start Sharing button, copy the invite URL and share it with your instructor when they want to have a look at your code.