| Warning | ||
|---|---|---|
| ||
This tutorial is still being worked on. Don't start working on it just yet. |
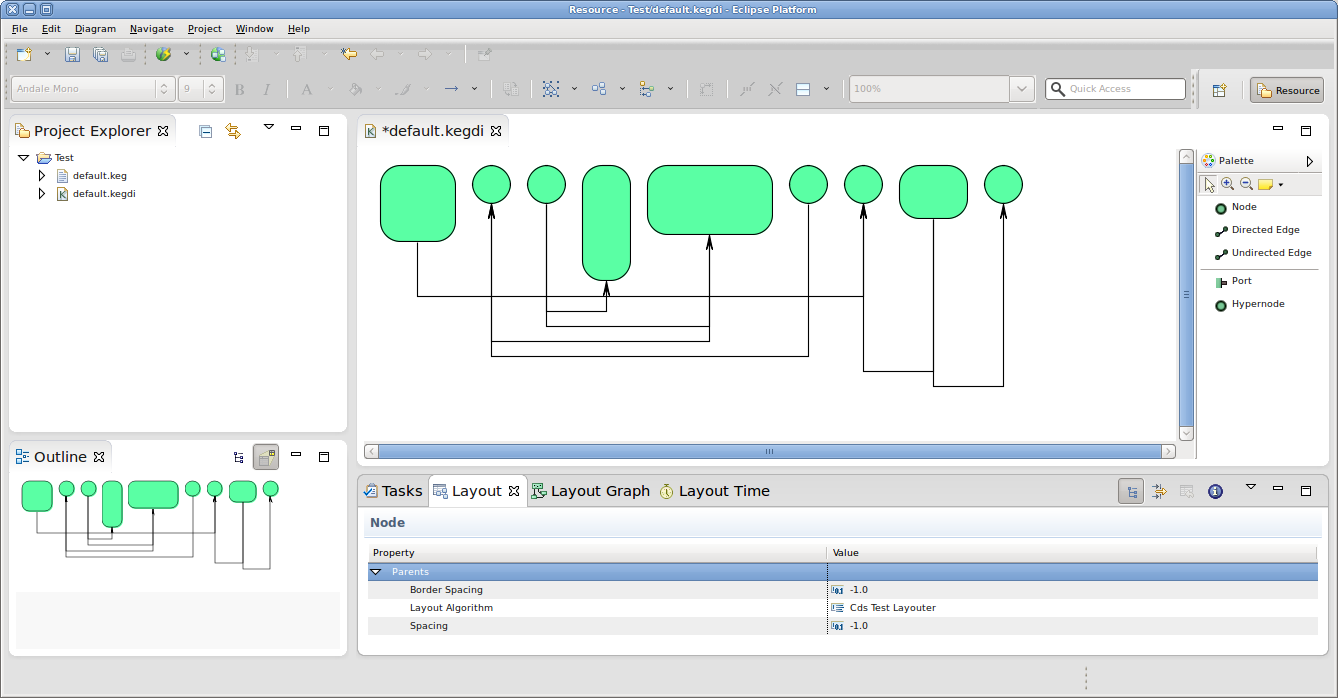
Welcome to the second tutorial! We will work our way through installing a proper Eclipse setup and developing a first very basic layout algorithm. The layout algorithm will integrate with KIML (KIELER Infrastructure for Meta-Layout), our very own framework that connects graphical editors with layout algorithms. Once you're finished, you should be able to create new Eclipse plug-ins and know how to write layout algorithms for KIML. And you should have a running Eclipse-based application that should look something like this:
| Warning | ||
|---|---|---|
| ||
Insert screen shot of final application. |
| Warning | ||
|---|---|---|
| ||
Insert link to presentation slides. |
| Table of Contents |
|---|
Preliminaries
...
As far as KIML and layout algorithms are concerned, you can always refer to our Wiki which has a section about KIML and the KIELER layout projects. The documentation is not complete, however, so feel free to ask Miro or Christoph Daniel for help if you have questions that the documentation fails to answer.
...
Add the following constants:
Code Block language java /** default value for spacing between nodes. */ private static final float DEFAULT_SPACING = 15.0f;
Use the following code as the skeleton of the
doLayout(...)method:Code Block language java progressMonitor.begin("Login_name layouter", 1); KShapeLayout parentLayout = parentNode.getData(KShapeLayout.class); float objectSpacing = parentLayout.getProperty(LayoutOptions.SPACING); if (objectSpacing < 0) { objectSpacing = DEFAULT_SPACING; } float borderSpacing = parentLayout.getProperty(LayoutOptions.BORDER_SPACING); if (borderSpacing < 0) { borderSpacing = DEFAULT_SPACING; } // TODO: Insert actual layout code. progressMonitor.done();- It is now time to write the code that places the nodes. Here's two suggestions for how you can place them:
- The simplest way is to place nodes in a row, next to each other. To make this more interesting, you could also place the nodes along the graph of a Sine function.
- Another way might be to place them in a square or a circle. You would have to think about how exactly to align the nodes, which may well vary in size.
...
| title | Tips |
|---|
...
- Your code should place them next to each other in a row, as seen in the screenshot at the beginning of the tutorial.
| Info | |||||
|---|---|---|---|---|---|
| |||||
The following tips might come in handy...
|
This exercise will introduce the usage of the Eclipse Plugin Development Environment for developing new layout algorithms to be used in Eclipse diagram editors. Replace each <login> by your own login name (e.g. msp), and each <Login> by your login name with capitalized first letter (e.g. Msp). For any questions contact mspBefore you can test your layout code, you will have to register your new layout provider with KIML.
- Open the file META
META-INF/MANIFEST.MF → Extensions tabMFfile again and switch to the Extensions tab. - Add an extension for defor
de.cau.cs.kieler.kiml.layout.layoutProviders. - Right-click the extension → New → layoutProviderSet name to <Login> Test Layouter, class to de.cau.cs.rtprak.<login>.tutorial2.<Login>LayoutProviderand click New > layoutAlgorithm.
- Set the name to
Login_name Test Layouterand the class to your layout provider class name. - Right-click the new layoutProvider → New → knownOption, set option to denew layoutAlgorithm and click New > knownOption. Set option to
de.cau.cs.kieler.spacing. - Add another knownOption, set to deanother knownOption for
de.cau.cs.kieler.borderSpacing. - Run → Run Save the editor.
We will now have to add a new run configuration that will start an Eclipse instance with your layout code loaded into the application, ready to be used.
- Click Run > Debug Configurations... → right-click Eclipse Application → New
- Name: Layout
- For testing the layouter, a new workspace location will be created; you may configure its destination in Workspace Data → Location
- Add the program arguments
-debug -consoleLogin the Arguments tab. Go to Plug-ins tab, select Launch with: - Right-click Eclipse Application and click New. Set the configuration's name to
Layout Test. - In the Arguments tab, make sure the the program arguments include
-debugand-consoleLog. - On the Plug-ins tab, set Launch with to plug-ins selected below only. Click Deselect All, activate Workspace checkbox, check the Workspace item in the tree, and click Add Required Plug-ins, Apply, Run.
- Click Apply to save your changes and then Debug to start an Eclipse instance to test with.
Test the layouter in
...
your new Eclipse instance:
- Click New → > Project... → General → Project, name test > General > Project and set the project name to something like
Test. - Right-click test project → New → Other... → KEG Diagram (TODO: if graphs shall be created in another way, describe it here)
- Create a graph using the palette on the right.
- Window → Show View → Other... → KIELER → Layout
- While the graph diagram is open, set Layout Provider or Type in the Layout view to <Login> Test Layouter.
- Open the additional views Layout Graph and Layout Time. Trigger layout with the KIELER Layout button in the toolbar or Ctrlthe new project and click New > Empty KEG Graph. Enter a meaningful name and click Finish.
- Put a few nodes into the diagram. To properly test your code, you will want to vary the sizes of the nodes. It may also be a good idea to get into the habit of giving each node a different name, such as N1, N2, etc. This will help you later if you have to debug your algorithm.
- Open the Layout view through Window > Show View > Other... > KIELER Layout > Layout.
- With your KEG diagram selected, set the Layout Algorithm option in the Layout view to your new algorithm.
- Save your KEG diagram.
- Trigger automatic layout by clicking the layout button in the toolbar, or by hitting Ctrl+R L (first Ctrl+R, then L).See
| Info | ||
|---|---|---|
| ||
You can see the direct |
...
output of your algorithm |
...
    /**
     * Route the edges that are connected with the children of the given node.
     * @param parentNode the parent node of the input graph
     */
     public void routeEdges(final KNode parentNode) {
         getMonitor().begin("Edge Routing", 1);

         getMonitor().done();
     }
...
        EdgeRouter edgeRouter = new EdgeRouter();
        edgeRouter.routeEdges(layoutNode);
...
and the time it took to run it through the Layout Graph and Layout Time views. The views are available through the |
Once you're satisfied with your node placement code, it's time to take care of edge routing.
Add a new method that will implement the edge routing using the following skeleton code:
Code Block language java /** * Routes the edges connecting the nodes in the given graph. * * @param parentNode the graph whose edges to route. * @param yStart y coordinate of the start of the edge routing area. * @param objectSpacing the object spacing. * @return height used for edge routing. */ private float routeEdges(final KNode parentNode, final float yStart, final float objectSpacing) { // TODO: Implement edge routing return 0; }- Add a call to
routeEdges(...)in yourdoLayout(...)method and implement the latter.
| Info | ||
|---|---|---|
| ||
Here's a few tips for implementing the edge routing:
|
...
|
...
|
...
|
...
|
...
|
...
|
...
|
...
|
...
|
...
|
...
|
...
|
...
|
...
|
...
|
...
|
...
|
Once you're done implementing the edge routing code, test it by running your debug configuration again, as before.
Before You Run Away...
...don't forget to commit your layout algorithm to your repository, and to push your commits to the tutorial repository on our server. If it's not there, we won't be able to see your work! ![]()