Page History
Program LEGO Mindstorms with leJOS and SCCharts
| Table of Contents | ||
|---|---|---|
|
...
Overview
Mindstorms is a product family from Lego, with sensors, motors and a programmable brick. The newest iteration of the product family is the EV3 programmable brick. Its predecessors are NXT and RCX. In the following we will see how to develop applications for the NXT brick.
...
...
Download and install leJOS
Download and extract the newest archives for your Operating System from Sourceforce (Linux/Mac) or use the Setup.exe (Windows).
...
Do not forget to flash the download leJOS firmware to the Mindstorms brick as explained in the tutorial!
Known issues
Linux
On Linux there is an issue when uploading the firmware because of a kernel module (http://ubuntuforums.org/showthread.php?t=1123633). If you can't upload the firmware with your Linux OS, add blacklist cdc_acm at the very end of the file /etc/modprobe.d/blacklist.conf. Afterwards execute sudo rmmod cdc_acm. This will remove the cdc_acm module from the kernel and prevent its restart. Now try to flash the firmware again.
...
Furthermore, to use USB connection, a java library has to be compiled via ant. To do this perform cd /path/to/leJOS/build and start ant. If the ant build tool is not installed on your system, you can do so via sudo apt-get install ant.
Windows
The setup.exe of the current LEGO Fantom driver for Windows (1.2.0) has an awkward issue. If you get an error message (Developer Error) because an .msi file could not be found, don't panic. The file is part of the downladed archive (in the Products folder) but you have to start it manually.
Mac OS X
The leJOS NXJ tools require a 32 Bit version of Java. However, newer 32 Bit versions of Java are not longer available for Mac. Thus to use leJOS the installation of Java 1.6 is required, which is the last one that supports a 32 Bit mode. You can download the installer for Java 1.6 from https://support.apple.com/kb/dl1572?locale=en_US. It will install Java 1.6 to /System/Library/Frameworks/JavaVM.framework/Versions/1.6.0/Home so that the environment variable LEJOS_NXT_JAVA_HOME, which is set in the installation instructions, points to the correct path.
The environment variable LEJOS_NXT_JAVA_HOME is set in the installation tutorial by editing ~/.profile. However, on a Mac the environment variables defined in this file are not visible for GUI Applications, only for apps started from terminal. Thus to use leJOS together with KIELER, one either has to start KIELER from terminal or set the environment variable so that all GUI applications can access it. However, this does not seem to be trivial on Mac (see also http://stackoverflow.com/questions/135688/setting-environment-variables-in-os-x).
...
Test the Mindstorm
A simple Hello World application for the Mindstorms is developed as part of the leJOS tutorial http://www.lejos.org/nxt/nxj/tutorial/Preliminaries/FirstProgram.htm
If this works with your device, you are able to start using KIELER to develop applications for the NXT brick.
...
Download and Configure KIELER
Download and unpack the nightly build of KIELER for your OS. It is available at the Downloads page.
Note: Java 1.8 is needed on all operating systems. With Java 1.7 not all plugins of KIELER will be loaded. Furthermore on Windows, you will need to download the 32 Bit version of KIELER – even if you have a 64 bit operating system! Otherwise flashing the brick and uploading to the brick will fail.
The Eclipse plugin for leJOS
There is an Eclipse plugin for leJOS which adds a project creation wizard and launch configuration to the platform.
...
For EV3, the plugin requires the IP address to connect to the brick (it may work without, but its safer to directly set the name. Reduces headache ![]() ). Check Connect to named brick and enter the IP adress of the brick (displayed on the brick at startup).
). Check Connect to named brick and enter the IP adress of the brick (displayed on the brick at startup).
...
Creating an Example Project
The following shows how to create a project, which will turn on a light if a button is pressed.
Create a new project:
- Choose File > New > Project > KIELER SCCharts > SCCharts Project
- In the project creation wizard that opens, select Mindstorms NXJ or Mindstorms EV3 (depending on your brick) as environment and hit finish
- The project wizard from the leJOS plugin opens. Set the project name to Flashlight and click finish.
- The project is created and the model file is opened in an editor (This might take a few seconds).
Edit the Model:
Change the contents of the model file to the following code and save it.
...
Note: To view ftl files with highlighting, you may want to install the FreeMarker IDE feature from the JBoss Tools. However, this is not necessary to work with KIELER. JBoss Tools is available in the Eclipse Market Place and via update site. The update site for stable releases is http://download.jboss.org/jbosstools/neon/stable/updates/ . Note that only the FreeMarker IDE feature is required (Abridged JBoss Tools > FreeMarker IDE).
Build the Project:
The model is now ready to be compiled. Compilation is done in the background when the project is built. There are two ways to build a project: manually using Project > Build Project, or automatically via Project > Build Automatically. If the automatic build is enabled, resources are built when they are saved.
...
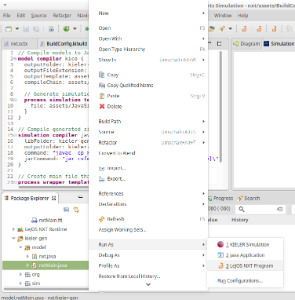
Besides the simulation, the finished wrapper code that can be uploaded to the Mindstorms brick is created as part of the project build. It is saved in kieler-gen/model. To upload it to the Mindstorms brick, use Right Click > Run as > leJOS NXT Program.
Excluding the Simulation from the NXT Build
It is necessary to exclude the simulation directory and org.json directory inside kieler-gen from the NXT project specific build via Right Click > Build Path > Exclude. Afterwards the project has to be build again to remove all error markers in these directories.
...
Normally the NXT project attempts to compile all Java files in the kieler-gen directory for the platform. However, the simulation that is generated is not targeted at the Mindstorms brick and has compilation errors. It is compiled separately by KIELER.
Available Wrapper Code Snippets
There are several wrapper code snippets that can be used as annotations on input and output variables in the model file. These snippets are inserted in the main file template as part of the project build. The available snippets are listed below.
...
| Snippet Name and Parameters | Description | Use on | Variable type | Remark | Defined in File |
|---|---|---|---|---|---|
| Clock, milliseconds | Sets a variable to true for one tick if the time in milliseconds passed since the last time it was set to true. | input | bool | See also ResetClock. | timing.ftl |
| ResetClock, clockVariableName, autoFalse | Resets a clock, such that the full time intervall of the clock has to elapse, before the clock will be set to true again. If autoFalse is true, the reset variable will be set to false automatically. | output | bool | autoFalse is true per default. | timing.ftl |
| Time | Reads the elapsed time since program start (milliseconds) | input | int | timing.ftl | |
| TickLoopDuration, targetInMilliseconds | Delays the execution until the tick loop takes at least as long as the given target duration. The input variable is set to the actual tick loop duration. | input | int | Should be used on the very first input variable in the model, such that waiting is the last action in the tick loop. In case the actual tick loop duration is longer than the target duration, the modeler can provide some error handling. | timing.ftl |
| TickWakeUp | Sets the input variable to the current system time (milliseconds). The model can add to this variable to get a new value. This is the next system time the tick function will be called. In other words, the next tick function call is delayed until the wake up time has been reached. For instance the statement nextTickWakeUp += 500 could be used to call the tick function again in 500 milliseconds, if nextTickWakeUp is an input with the corresponding annotation. | input | int | Should be used on the very last input variable in the model, such that waiting and settings the system time is the last action done, before the tick function call. | timing.ftl |
| TickCount | Counts the ticks. First tick is 0, the following are 1, 2, 3, ... | input | int | timing.ftl | |
| Sleep | Lets the current thread sleep the time in milliseconds of the variable value. | output | int | timing.ftl | |
| Print, autoReset | Prints a string variable if the string is not empty. If autoReset is true then the string variable is set to the empty string after it has been printed | output | string | autoReset is true per default. | print.ftl |
| DrawString, x, y | Prints a string to the given x and y coordinate on the LCD. | output | string | print.ftl | |
| Button, buttonId | Sets a variable to true iff the button on the Mindstorms device is pressed. | input | bool | The buttonId has to be one of ENTER, LEFT, RIGHT | touch_and_buttons.ftl |
| TouchSensor, port | Sets a variable to true iff the touch sensor on the given port is pressed. | input | bool | touch_and_buttons.ftl | |
| LightSensor, port, percentValue | Reads the value of a light sensor. If percentValue is true, the a percent value is retured, based on the light sensor calibration. | input | int | percentValue is not available on EV3 | light.ftl |
| CalibrateLightSensor, port, signal | Calibrates a light sensors high or low values. This means if the variable is true, the current value of the light sensor is taken as its reference high / low value. | output | bool | signal has to be one of High, Low | light.ftl |
| Floodlight, port | Reads / Sets the state of the red lamp of the light sensor. | input output | bool | light.ftl | |
| RCXLamp, port | Turns an RCX lamp on (variable is true) or off (variable is false) | output | bool | light.ftl | |
| MotorSpeed, port, brake | Reads / Sets the speed of the motor in degrees per minute. If the speed value is negative, the motor will drive backwards. If the speed is zero, the motor will actively brake until it stops (brake is true) or remove all power and rollout (brake is false). | input output | int | brake is true per default. | motor.ftl |
| MotorIsMoving, port | Sets a variable to true iff the motor on the given port is moving. | input | bool | motor.ftl | |
| MotorRotation, port | Lets a motor rotate the variable value in degrees. This is only done if the value is unequal zero. If the value is negative, the motor rotates backwards. The variable is set to zero afterwards, such that setting the variable once to a value X, will let the motor rotate X degrees. | output | int | motor.ftl | |
| Beep, volume | Plays a beep sound as long as the variable is true. | output | bool | default volume is 10 | sound.ftl |
| Buzz, volume | Plays a buzz sound as long as the variable is true. | output | bool | default volume is 10 | sound.ftl |
| BeepSequence, direction, volume | Plays a sequence of tones in either ascending or descending tone frequency if the variable is true. The variable is set to false automatically. | output | bool | direction has to be one of Up, Down default volume is 10 | sound.ftl |
| UltrasonicSensor, port | Reads the distance that an ultrasonic sensor measures. | input | int | ultrasonic.ftl | |
| Gyro, port, mode | Reads the value of a gyroscope. | input | int | Not available on NXT mode hat to be one of Angle, Rate | gyro.ftl |
| CalibrateGyro, port, autoReset | Resets a gyroscope if the variable is true. If autoReset is true, the variable is set to false automatically. | output | bool | autoReset is true per default | gyro.ftl |
...
Using the Remote Console (RConsole)
The display of the NXT brick is rather small compared to a Monitor. To ease debugging, one can print to a Remote Console (RConsole), if the USB cable is connected. This enables easier collection for example of sensor data.
...
The EV3 brick has a similar feature. However it does not require any code changes. Just run the ev3console program in the bin directory of your leJOS installation from command line. The output of the brick will be printed to this command line.
...
Problem Solving
The following presents typical issues and how to solve them.
...
Overview
Content Tools