Related Publications
Steven Smyth and Alexander Schulz-Rosengarten and Reinhard von Hanxleden. Towards Interactive Compilation Models. In Proceedings of the 8th International Symposium on Leveraging Applications of Formal Methods, Verification and Validation (ISoLA 2018), volume 11244 of LNCS, page 246–260, Limassol, Cyprus, November 2018. Springer.
In this tutorial we will set up a plugin for KiCo compilation and create processor and compilation system that will convert a text file into a text file with all upper case characters.
Setup Dependencies
To use and develop with KiCo you need to setup or integrate the KiCo framework into your Eclipse IDE. There are two scenarios:
- If you are a KIELER developer, you can set up your KIELER development IDE by following our Oomph setup tutorial
- If you want to use your own eclipse setup, you can use our updatesite to install KiCo
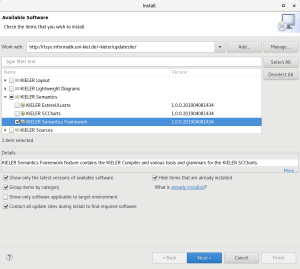
- Go to Help > Install New Software
- Enter our release updatesite (http://rtsys.informatik.uni-kiel.de/~kieler/updatesite/) or the nightly (http://rtsys.informatik.uni-kiel.de/~kieler/updatesite/nightly/semantics/) if you want to get the latest features and fixes immediately.
- Select the KIELER Semantics Framework feature (see screenshot). You may also want to add KIELER SCCharts, as it is required for other tutorials for KiCo.
- (optional) If you have a target platform defined, you probably need to add the updatesite and features there too.
Create a Plugin
For this tutorial we will create a new eclipse plugin to carry our processors and systems.
- New -> Project...
- In the project wizard, choose Plug-in Project and click Next.
- As the project name, enter
de.cau.cs.kieler.tutorials.kico. Click Next. - As the name, enter
KiCo Tutorial. Uncheck all checkboxes in the Options section. Click Finish.
(Eclipse might ask you whether you want to switch to the Plug-in Development Perspective, which configures Eclipse to provide the views that are important for plug-in development. We recommend you do.) - Eclipse has now created your new plug-in and (usually) opened the Plug-in Manifest Editor, which allows you to configure your plugin. Go to the Dependencies tab and add a dependency to
de.cau.cs.kieler.kicool(see screenshot).

Register the Processor
With KiCo 3.0 processors are no longer registered individually vie Eclipse extension points. Instead a provider is created that is loaded via the service loader mechanism and that registers all the processors of a plugin in one batch.
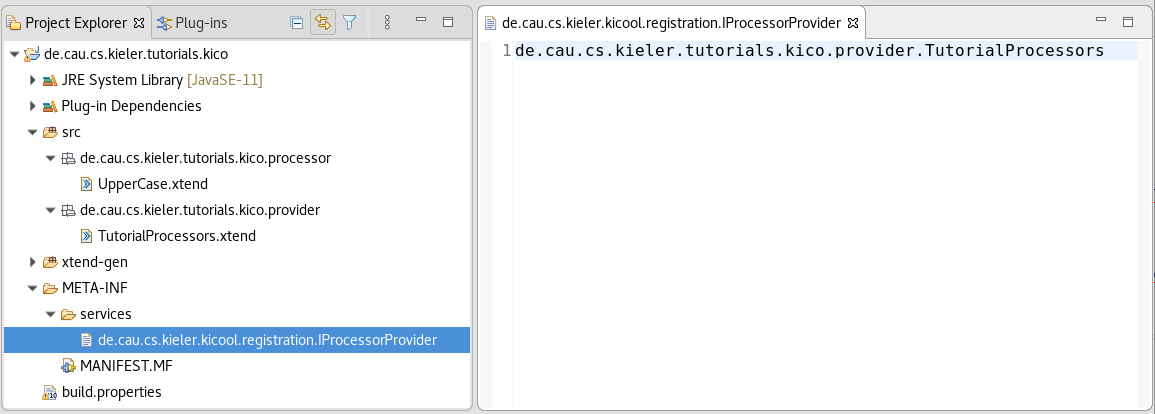
First, create a new class TutorialProcessors that implements the de.cau.cs.kieler.kicool.registration.IProcessorProvider interface. Implement getProcessors() and return the UpperCase processor class in a list (see code listing on the right).
Now the provider needs to be registered, for KiCo to be able to find it. This is done according to the service loader specification:
- In the META-INF folder of your plugin project create a new folder named services
- There you create a new file named
de.cau.cs.kieler.kicool.registration.IProcessorProvider - In this file, the fully qualified names of all classes that implement the interface should be listed (one per line) to make it available to KiCo.
In this case addde.cau.cs.kieler.tutorials.kico.provider.TutorialProcessors
package de.cau.cs.kieler.tutorials.kico.provider

import de.cau.cs.kieler.kicool.registration.IProcessorProvider
import de.cau.cs.kieler.tutorials.kico.processor.UpperCase
/**
 * Registers all tutorial processors.
 * @author Alexander Schulz-Rosengarten <als@informatik.uni-kiel.de>
 */
class TutorialProcessors implements IProcessorProvider {

    override getProcessors() {
        return #[
            UpperCase
        ]
    }
}
Create a Compilation System
A processor is only one unit in the compilation and KiCo uses compilation systems composed of processors (and other systems) for compilation. Hence, to actually use our processor we need to include it in a system.
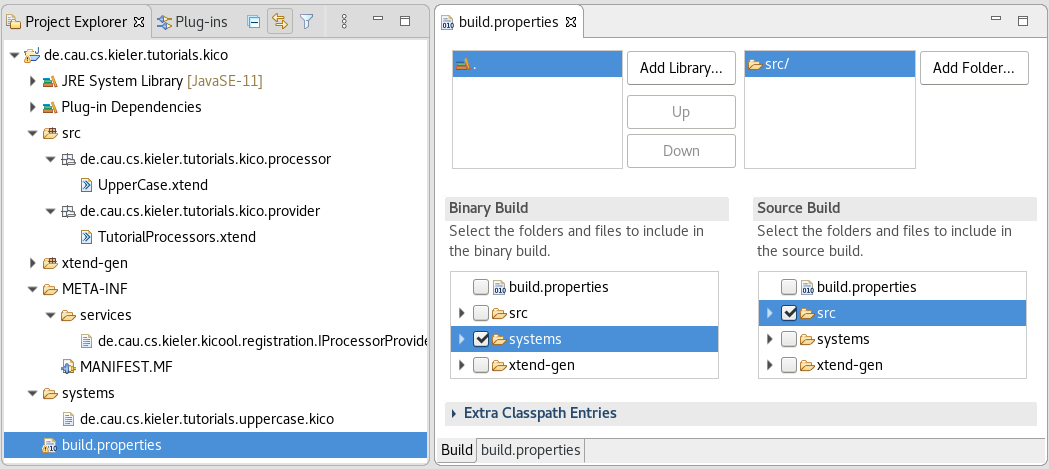
First, create a new folder for your systems in your plugin project, let's name it systems. Open the build.properties file in your project and tick the new folder in the Binary Build section. Otherwise your systems will not be part of your jar when you deploy your plugin.
Now create a new file de.cau.cs.kieler.tutorials.uppercase.kico in the systems folder and open it.
Compilation systems are written in their own DSL. If you want to have full editor support for .kico files, you can install the KIELER Semantics Framework feature into your development eclipse. For this tutorial just copy the code below into the file.
public system de.cau.cs.kieler.tutorials.uppercase
    label "Upper Case"

de.cau.cs.kieler.tutorials.uppercase
Register the Compilation System
Same as processors, systems are also registered via a provider class.
Create a new class TutorialSystems that implements de.cau.cs.kieler.kicool.registration.ISystemProvider. Implement getBundleId() and return the ID of your plugin, as well as getSystems() where you return a list of plugin relative paths to your kico files. In this case: systems/de.cau.cs.kieler.tutorials.uppercase.kico
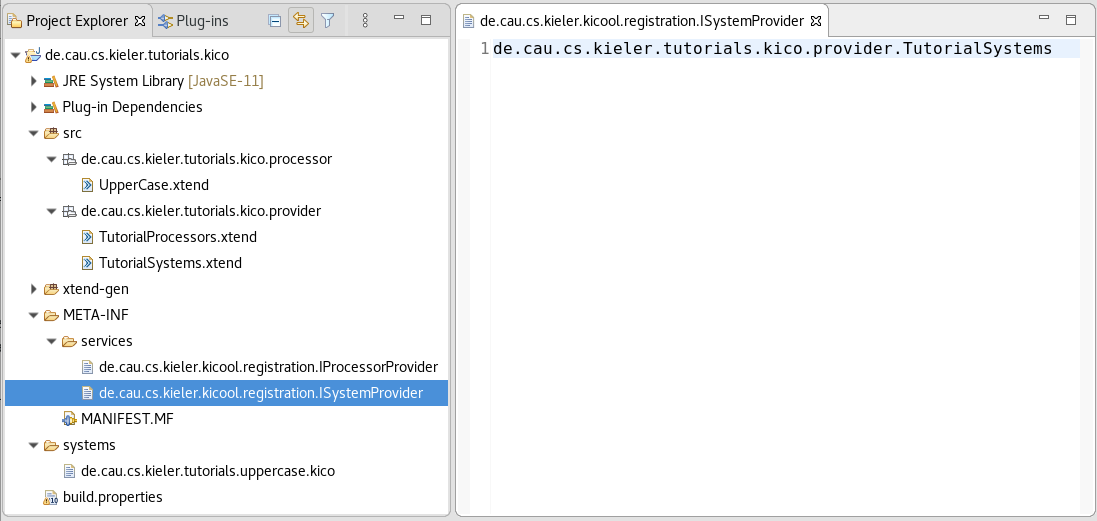
Then create a file named de.cau.cs.kieler.kicool.registration.ISystemProvider in the META-INF/services directory and add the qualified name of the provider class ( de.cau.cs.kieler.tutorials.kico.provider.TutorialSystems)
package de.cau.cs.kieler.tutorials.kico.provider

import de.cau.cs.kieler.kicool.registration.ISystemProvider

/**
 * Registers all tutorial systems.
 * @author Alexander Schulz-Rosengarten <als@informatik.uni-kiel.de>
 */
class TutorialSystems implements ISystemProvider {

    override getBundleId() {
        return "de.cau.cs.kieler.tutorials.kico"
    }

    override getSystems() {
        return #[
            "systems/de.cau.cs.kieler.tutorials.uppercase.kico"
        ]
    }
}
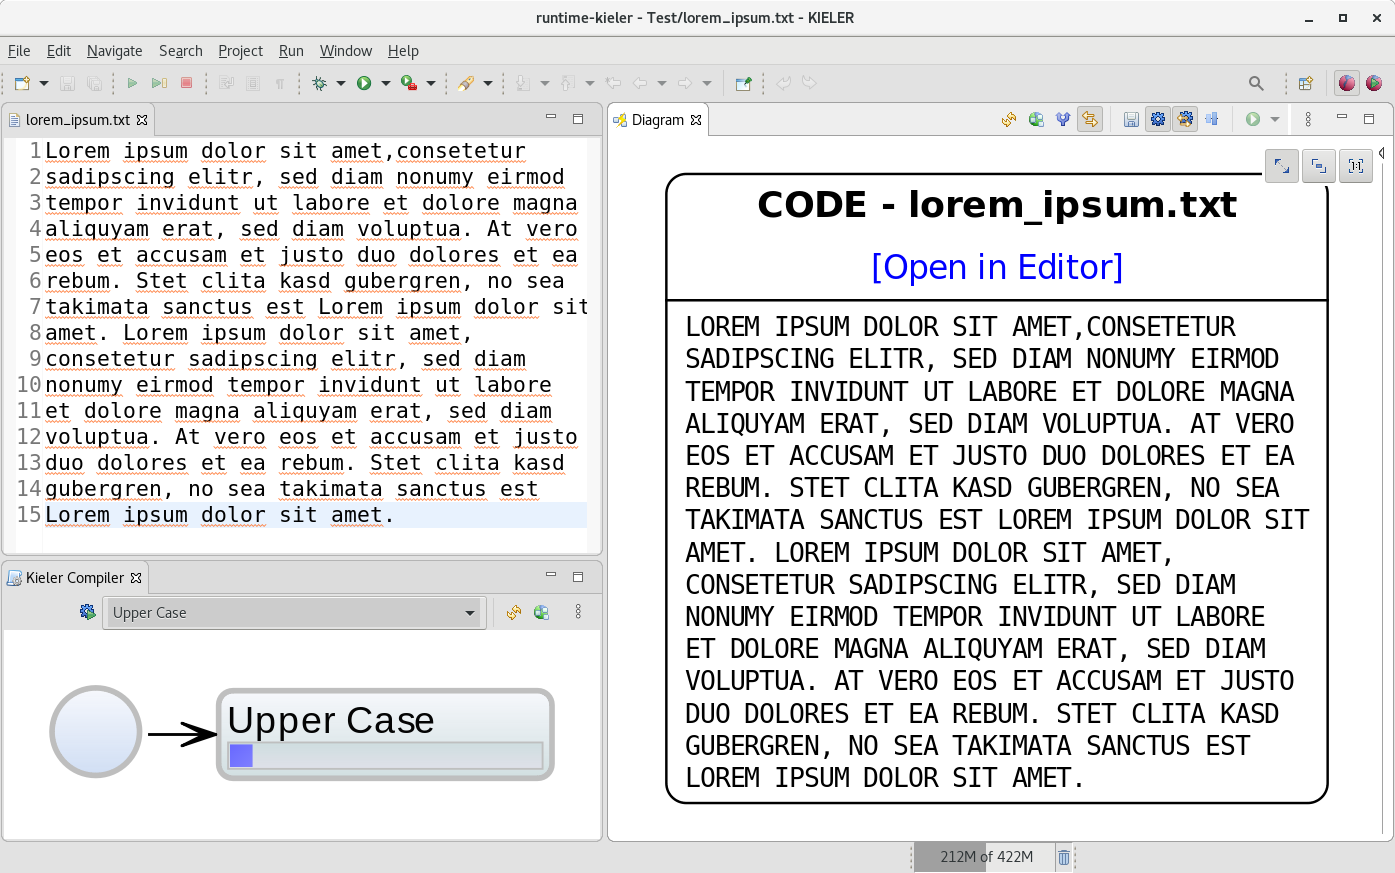
Test your Transformation
Now that we have created and registered our new compilation system with a processor, we can start transforming file content into upper case.
Start your runtime Eclipse and make sure your new plugin and all its dependencies are included in the run configuration. Create a new text file with some content. Open the Diagrams and KIELER Compiler view via Window → Show View → Other...
By default the compiler view shows the identity system, hence, select your Upper Case system in the combo box in the toolbar of the view and click the compile button left of it. The result of the compilation will be shown in the Diagram view.